You can sort and filter schedules and reports so that you can easily access the specific information you are looking for at any given time.
You may sort all columns in all schedules and reports by ascending or descending order.
1. Open a schedule or report.
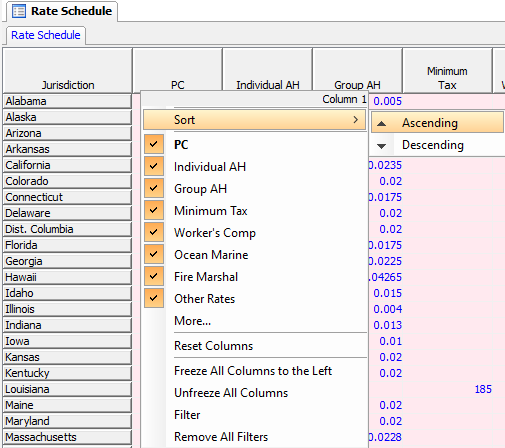
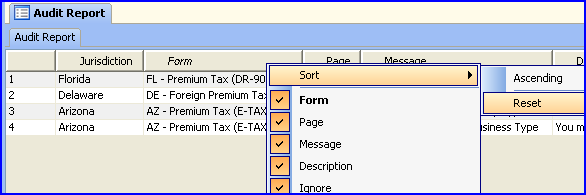
2. Right click on the column you would to sort. Then go to Sort and select Ascending or Descending.
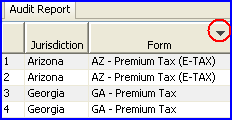
3. The heading of the sorted column will display an up/down triangle in the corner indicating the sort action.

4. To revert to the original order, right click on the sorted column, go to Sort, and then select Reset.
The sorted schedule or report will NOT be saved. When you close the sorted schedule or report and then open it again, it will revert to the original. When you print, the sorted schedule or report that is displayed on your screen will print.
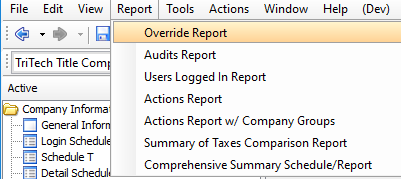
1. Open the appropriate report by going to Report from the file menu and selecting Override Report or Audit Report.
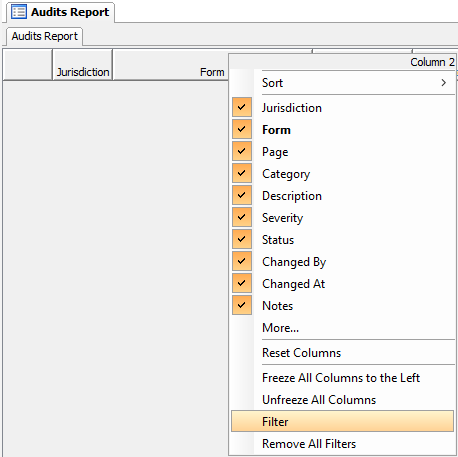
2. Once the report is open, right click on the column heading for the column you wish to filter, and then select Filter.
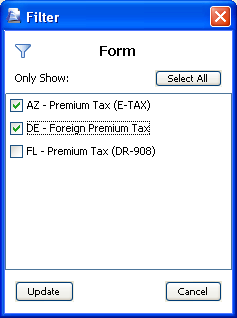
3. A Filter dialog box will appear. Check the items that you would like to be displayed in the report. Click Update to filter the column.
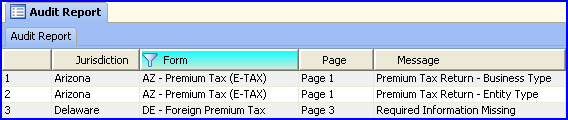
4. The column heading for columns that you apply filters to will be highlighted in blue.
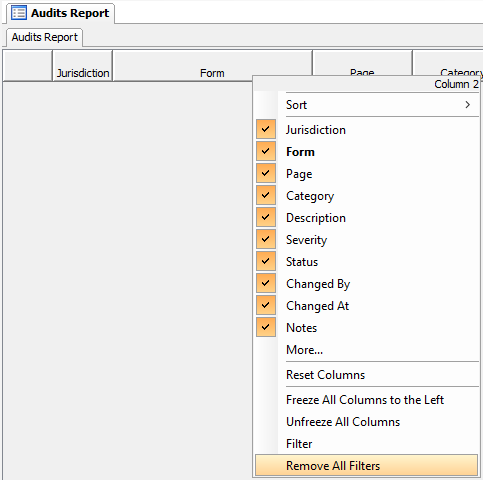
5. To remove specific filters, right click on the column heading, then select Filter. You can then uncheck the filter from the dialog box. Or, to remove all filters, right click on any column heading and select Remove All Filters.
Your filters will be retained when you close a report. The next time you open the report, the same filters will be applied. Also, when you print, the filtered report that is displayed on your screen will print. The full report will not print.
You may filter number columns in schedules to display items that are within certain value ranges.
1. Open any schedule that includes numbers.
2. Once the report is open, right click on the column heading for the number column you wish to filter, and then select Filter.
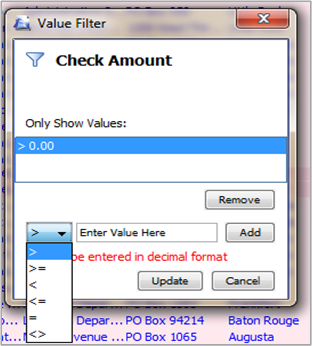
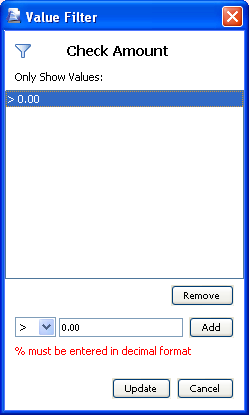
3. A Value Filter dialog box will appear, which allows you to filter items within a certain value range. From the dropdown box, choose the appropriate symbol (greater than, less than, equal to, etc.). Then type in the value in the text box and click Add.
4. When you have finished adding your value filters, click Update.
5. The column heading for columns that you apply filters to will be highlighted in blue.
6. To remove a value filter, right click on the filtered column and select Filter.
7. The Value Filter dialog box will appear. Select the filter you wish to remove under “Only Show Values:” and then click the Remove button.
8. Click the Update button to remove the value filter.
9. Or, to remove all filters at the same time, right click on the column heading for the filtered column and select Remove All Filters.
The filtered schedule will NOT be saved. When you close the filtered schedule and then open it again, it will revert to the original schedule. When you print, the filtered schedule that is displayed on your screen will print. The full schedule will not print. It is important to note that the total line will not be affected by filters. The total will always remain the same, regardless of the filters that are applied to the schedule.
Any column in any schedule can be reordered. To move a column, simply click the desired column heading and drag it to the new location on the schedule.
You can also freeze columns so that they are visible when you scroll your screen to the right. To freeze a column, right click on the desired column heading and select Freeze All Columns to the Left. When you scroll, the frozen column and all columns preceding the frozen column will always remain in view. The order of the frozen columns cannot be modified. To unfreeze columns, right click on any column heading and choose Unfreeze All Columns.
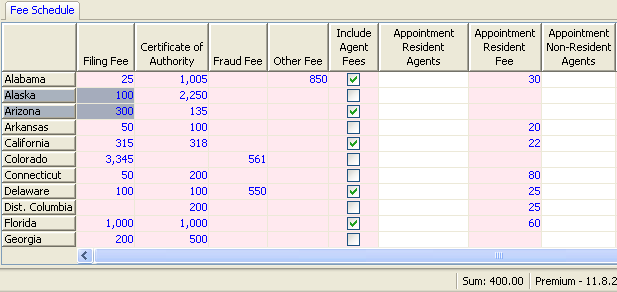
Tip: If you highlight multiple adjacent cells in a schedule, the sum will appear in the status bar in the lower portion of the screen.
You can hide any column by right clicking on a column heading and unchecking the column you would like to hide. If there is a hidden column you want to display, right click on any column heading and check that column name.
In this Topic Hide
Steps to Sort Schedules and Reports
Steps to Filter the Override Report and Audit Report
Our website address: www.tritechsoft.com
Our mailing address: 1205 S. Greenville Ave, Allen, TX 75002.
Questions? You can reach us at 1-800-380-6407
Or contact WebSupport here.
©1995-2018 TriTech Software Development Corp. ©2006-2018 TriTech Services Inc. All rights reserved. Premium Pro® is a registered trademark.